📝 Note: This “Transcripts” tab is marked as soon obsolete. It still works, but should ultimately be replaced by the "Gene List" workflow.
Step 1 - Prepare your transcript file
- Create a plain text file (.txt) with one RefSeq transcript ID per line, typically NM_… entries.
Example:
-
- NM_000059.4
- NM_007294.4
- Save it with a clear name, e.g., BRCA_transcripts.txt
- Note: transcripts can have a version (NM_000059.4) or not (NM_000059). The version will not be used for filtering, due to it's quick evolution in references.
Step 2 - Upload the file to your user settings
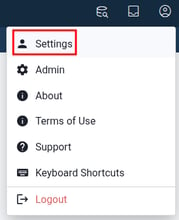
- Go to Settings → Transcript → Add RefSeq entries.
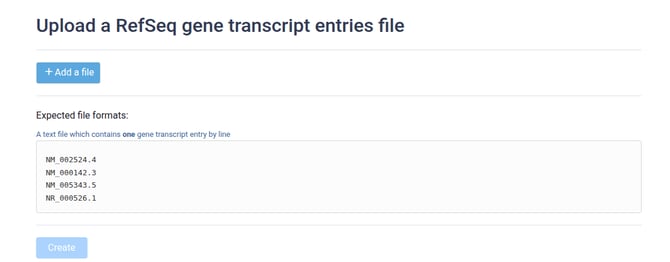
- Click "+Add a file" and Upload your .txt file.
Step 3 - Apply it in your analysis
You have 2 possibilities to add the transcript list in your analysis.
Option 1: From QC tab
-
Open your analysis and go to the QC tab.

- Select your transcript list. The Variants tab will automatically restrict displayed transcripts to your list.
Please note, if you add your transcript list from the QC tab:
- The filter will apply to the whole analysis: GeneCov tab + Variants tab.
- When adding/removing filters in the Variants tab, it will always stay on (in addition to the other filtering)
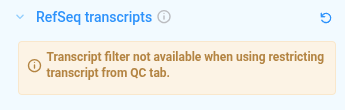
- you will not be able to modify it directly from the Variants tab. To update or remove the transcript list, you must return to the QC tab. Otherwise, the following message will appear in the "RefSeq transcripts" filter:
Option 2: From Variants tab
- Open your analysis and go to the Variants tab.
- Select your transcript list in the 'RefSeq transcripts' filter. The Variants tab will automatically restrict displayed transcripts to your list.
It will only apply to the Variants tab, and you can remove or change the transcript list from the RefSeq transcripts filter.